Sunday 30 June 2013

ATC Cards

Here are all the ATC sized cards I have recently made, I keep them in a folder, in plastic wallets, that I 'borrowed' from my son's Pokemon collection!!!
They really are cute.
It is a great way though to keep track of cards you have made and what equipment you used to make them. I have separate pages for Christmas cards which I add to each year as well.

Friday 28 June 2013

Awning Card

I found these cards whilst browsing through pinterest and thought I can make them, especially as I seem to have rather a lot of stampin up stuff, I mean equipment.
 The awning is made with the word window punch and the 'shop front' with the lattice embossing folder edged with the scallop punch.
I added stamped images for the 'shop window', they could be anything.
These cards have a real summery feel to them, I think it is the colours used, they remind me of fun fair and summer fairs.
Yes I made an ATC card, I think it looks too cute!!

Tuesday 25 June 2013

Cascade card

In April I made a cascade card for a class I taught, this card is a bigger version of that card, I've added daisies, more butterflies and more glitter!!
 As big as the card is open it still folds down to fit into an C6 envelope, I love it!!
Again I've made an ATC size one, what a run I'm having, think of all that inspiration I'll be able to have later on!!

Friday 21 June 2013

Butterfly Card

At a crop I went to Helen showed me a picture of a card she had seen on pinterest, so here is my version of it.
The stamps I used are from Woodware and the inks are Tim Holtz distress inks. The thread is from stampin up.
I lined the stamps up on a block and coloured each one separately. I like the way it has not stamped solid colour and gives the butterflies more texture.
Then I cut around the butterflies leaving a small white edge.
The sentiment was then stamped. I think the thread finishes the card, it looked very bear without it.
The card on the left is ATC size, I made it to keep as a reminder. I'm getting quite a collection now!!

Monday 17 June 2013

Chalkboard Cards

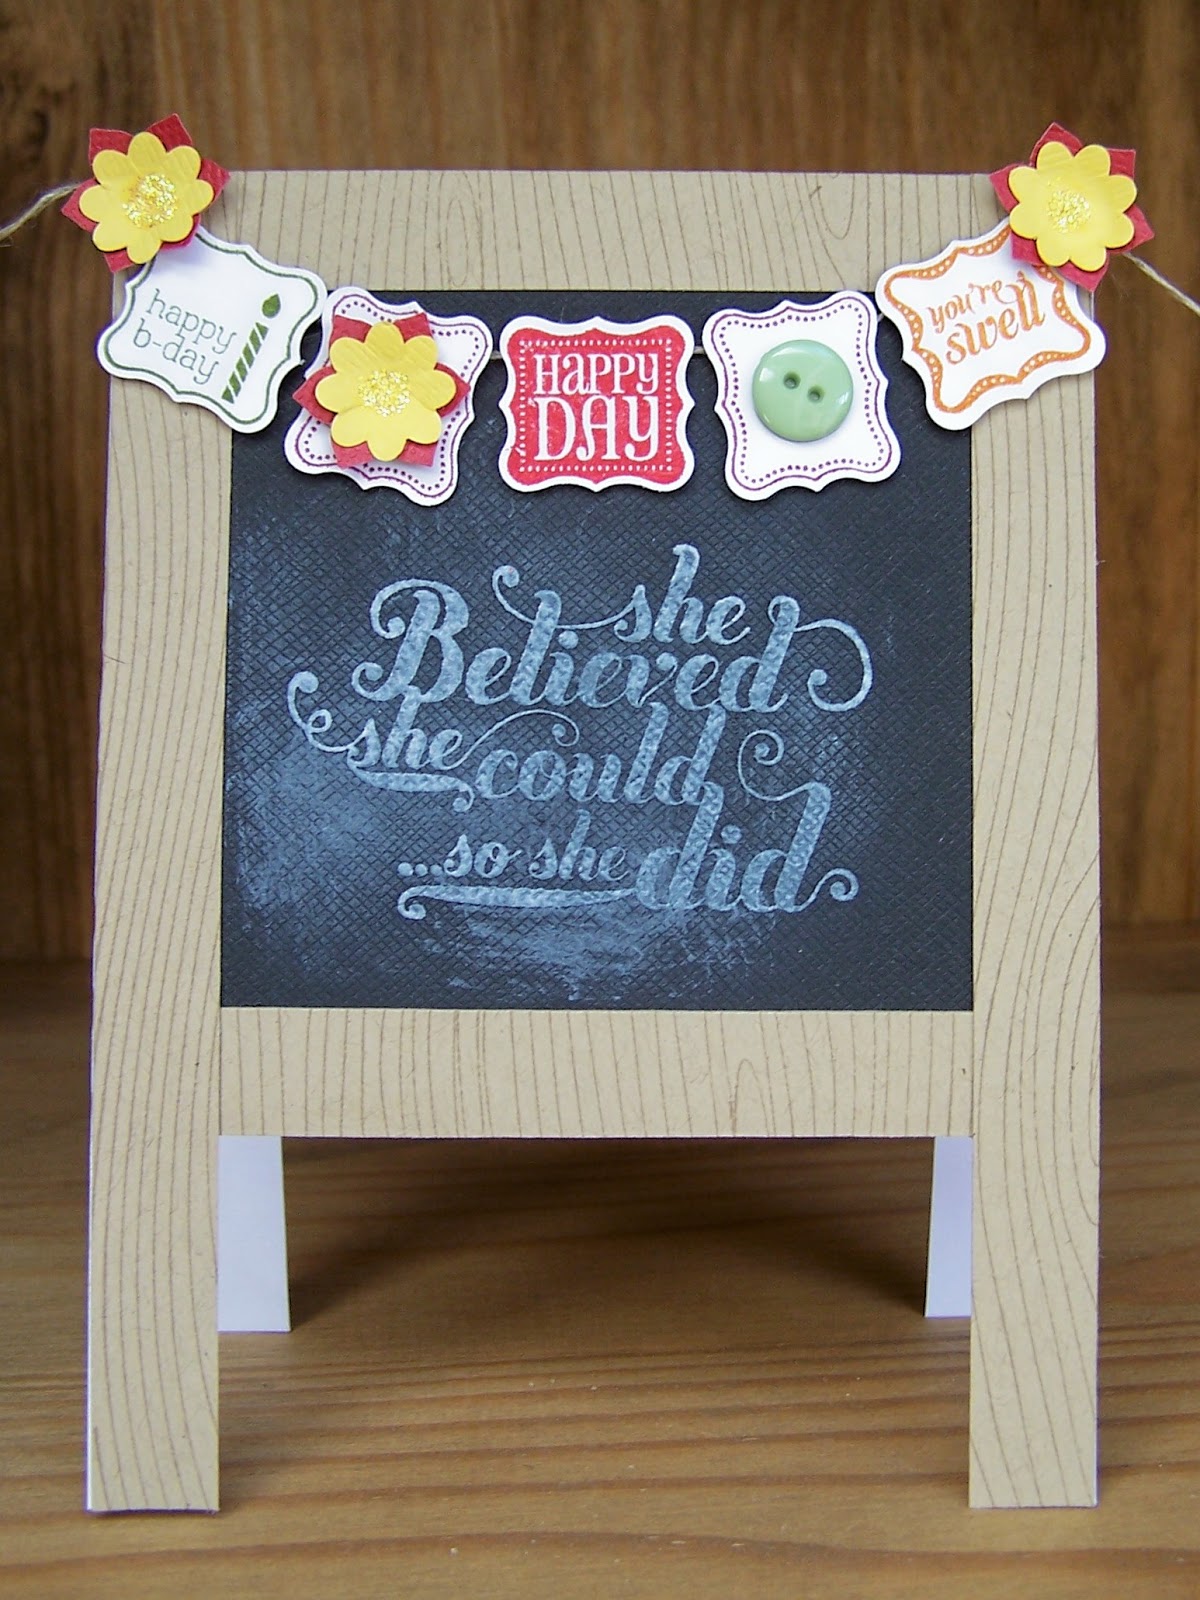
I just love the chalkboard effect cards, and I really love them when on an actual chalkboard style card.
I followed the easel instructions I found on 'feather tassel blog' by the very talented Angie.
With the card above I stamped the words with white ink then heat embossed them with clear embossing powder before rubbing white ink in for the chalkboard effect.
On the card below I stamped with white ink then heat embossed with white embossing powder before adding the chalky effect.
Both ways look great it just depends whether you want the image to pop or not. 
 The saying 'she believed she could so she did' is now my friends' mantra.
The mini card on the left is ATC size, whenever I make a card I really like I also make one ATC sized one to keep, they also act as good reminders or for inspiration!!

Thursday 13 June 2013

Jelly Bean Jars

I love collecting (my family say hoarding) mini jars etc that I can use for all sorts of things.
I have made these for Father's Day gifts, not enough sweets to get fat on but just enough to satisfy the need for sugar!!
 I started by attaching white circles to the lids, then glued coordinating ribbon around the edge of the lids, which I then topped with a scallop circle. To this I added another white circle which I inked around and a stamped smaller scallop circle.
I stamped and punched out the yum tag and pushed the thread under the topper, what I should have done was attach the tag to the topper then put the topper on the lid..............next time!!
All the stamps and punches I have used are from stampin up.
Finally I filled the jars with yummy jelly beans.
Hope they like them!!

Monday 10 June 2013

Wedding Card

Here is another Wedding Card, I said I had been making a lot of cards lately!! 
This one I made for a family member who is in the Police Force, as is his new wife.
My Mum wanted the card to be of police cars, so I found these ones in a sketch on google images, I know they are cartoony but English police cars did not look so great when I had cut them out of card.


Once I had paper pieced the cars together I used a spellbinders set to cut the white card,
I added the mini flowers and leaves along with glitter so the card had a more of a wedding feel to it.
The cars took an age to draw, cut and piece together but I am pleased with the end result.

Thursday 6 June 2013

Tithe Barn Class Card

Here is the card we will be making at Tithe Barn this Saturday, places are limited so if you wish to book a place please contact Karen.
As you can see I'm still in Wedding Card mode!!
For the class you will need glue or double sided tape and pinflair glue if you have it. Everything else will be provided.

Tuesday 4 June 2013

Anniversary Card

 I made this card for Karen and John's 25th Wedding Anniversary.
I used my cricut again and a new set of swirly stamps I bought from the Bury Show.
 The butterflies are punched from vellum but they looked a bit dull so I added stickles star dust to their centres. This then made the swirls disappear so I added glitter to them as well.
 The wording is heat embossed in silver, so there are lots of different textures happening on the card.
I like the softness of the butterflies with the hardness of the hearts.

Sunday 2 June 2013

Wedding Card

The wedding season is now upon us, I have made several wedding cards recently for friends and family.
This is a card for a friend who loves elegant, stylish things and the odd bit of bling!!
The card is 6"x 6".
 I used my cricut to cut the heart and heart flourish, I used cuttlebug swirls to emboss the backing card, the teal ribbon is covering where I had to add extra embossing. The sentiment is from stampin up, as are the punches I used.